

1.
The Azure P2S (Point to Site) VPN Client Traditionally installs per user and requires administrative rights to install. This means that in order to use the P2S VPN users must have local admin rights on their workstations, which is not possible in most enterprise environments. This guide provides a method for deploying the Azure P2S VPN client without the need for User local admin rights, it is installed with admin rights on the computer and is able to be used by all users on the workstation (assuming they have a valid user certificate as per standard Azure P2S configuration). This solution works with SCCM and other deployment mechanisms and is perfectly suitible for clients connecting into a DR environment in Azure Site recovery. I was not able to find another solution to this at the time of posting so i hope this will be of some help.
Th
1. Download VPN client from Azure
2. 2. Extract the package using the following command {guid}.exe /T:{Path to Extract Folder} /C

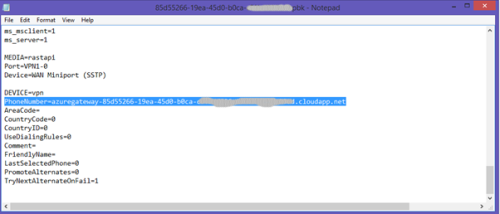
3. 3. Find the {guid}.pbk file -> right click -> edit in notepad
4. 4. Go through the PBK file until you find an entry called “PhoneNumber=”, the string after this is the URL your VPN will connect to. Record this URL for later use
5. 5. In the extracted folder locate the {guid}.cer certificate file and copy it to a new folder where the package will be built.
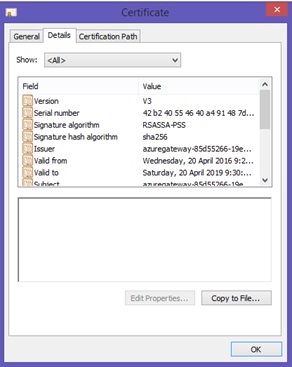
6. 6.Now you need to get the thumbprint of the certificate file. Double click on the {guid}.cer file to bring up the certificate properties and Navigate to the details tab
7. 7. In the “Show” drop down box select “Properties Only” and highlight the Thumbprint item .
8. 8. Select the thumbrint in the bottom section and copy and paste the string to notepad
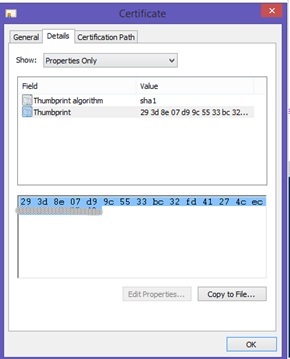
9. 9. In notepad remove all the spaces from the thumbprint string and record the modified string for future use

1 10. Create a new Powershell script in the same packaging folder as the certificate and copy and paste the below code into the script:
#Define These Properties
$certificatefile = "<name of certificate file here>"
$vpnurl = "<vpn url from pbk PhoneNumber>"
$Thumbprint = "<Certificate Thumbprint without spaces>"
$connectionName = "<display Name for your VPN connection>"
$dir = Split-Path ($MyInvocation.MyCommand.Path)
$connections = Get-VpnConnection -AllUserConnection
$connectionexists = $false
if (!(Test-Path "Cert:\LocalMachine\root\$thumbprint")) {
Start-Process "certutil.exe" -ArgumentList "-addstore root `"$dir\$certificateFile`""
}
foreach ($connection in $connections) {
if ($connection.Name -eq $connectionName) {
$connectionexists = $true
}
}
if ($connectionexists -eq $false) {
$EAP = New-EapConfiguration -verifyServerIdentity -UserCertificate -Tls
Add-VpnConnection -Name $connectionName -ServerAddress $vpnurl -TunnelType SSTP -EncryptionLevel Required -AuthenticationMethod Eap -EapConfigXmlStream $EAP.EapConfigXmlStream -SplitTunneling -AllUserConnection -Force -PassThru
}
11. 11. In the section “Define These Properties” Replace the strings with the relevant information
a. $certificatefile – The name of the .cer file copied into the packaging folder
b. $vpnurl – the url copied out of the pbk file with the property name PhoneNumber (Does not include the “PhoneNumber=” component, just the following URL)
c. $thumbprint – The thumbprint string with no spaces previously manipulated in notepad.
d. $connectionName – A name for the connection. This will be displayed to the user under network connections

12. Run this script with administrative rights to install the VPN connection for all users on the system. Users will require user certificates in order to authenticate as per standard Azure P2S VPN configuration.
View inventory records anonymously contributed by opt-in users of the K1000 Systems Management Appliance.
add-vpnconnectionroute https://docs.microsoft.com/en-us/powershell/module/vpnclient/add-vpnconnectionroute?view=win10-ps - bongobot 3 years ago