
The Software Library is a great way for you IT team to post authorized software for users to download themselves. Since the agent runs as a service with local admin rights, there is no need to your IT team to remote into an end user's machine to allow a software application to be installed. In this guide, I will walk you thru the process of setting up Google Chrome internet browser in the K1000 software library.
Before we can set up the Software Library item, we must first have the following steps completed:
Download the Google ChromeStandaloneEnterprise.msi (used for example)
Have Google Chrome listed for the program in Software Inventory.
Note: Ensure that your version matches the installer downloaded. I recommend manually installing the program on a test box that has the KACE agent installed, and then forcing a check in. That’s the easiest way to create the item.
- Click the Google Chrome link to jump to the software inventory page for that item; Inventory -> Software
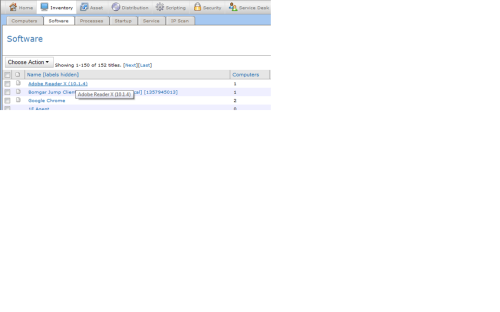
From here, you can see that we have prepopulated a lot of information about the software.
- Scroll down the page to select the operating systems it will be installed on
- Add the installer downloaded earlier under the Associated Files section by using the Choose File button
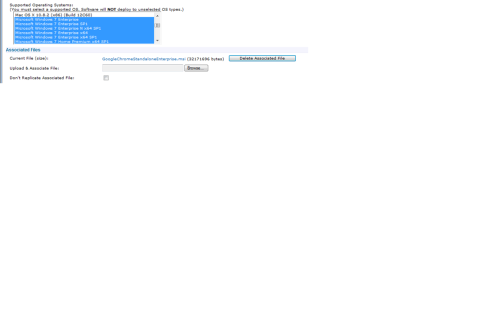
- Save when done
Now, we are ready to set up our Software Library install.
- Go to Service Desk -> Software Library -> Add New Item:
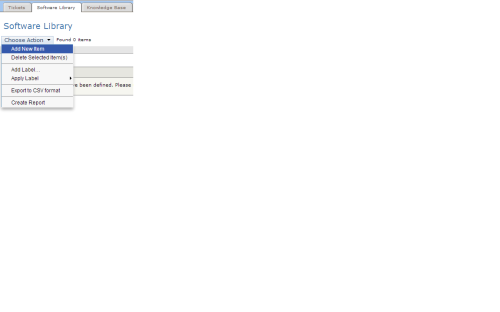
- Choose Install for Package Type and then select the Google Chrome software item from the dropdown list:
- Download = Will deploy similar to a manual installation. The file will push to the client, and the end user has to go thru the setup wizard.
- Install = Will deploy using the command entered in the install command line
- Script = Allows you to deploy an script that has been created
- Once it’s selected, use the following command line to install:
msiexec.exe /i GoogleChromeStandaloneEnterprise.msi /qb
Note: The /qb allows the user to see a progress bar, which lets the end user know the process is working. Use /qn for a fully silent install.
- You can also add installation instructions to the page and limit access to specific user labels. (optional)
- Click the Enabled check box at the top of the window, and then click Save.
Note: Click OK on any informational pop-ups that come up. You may see the Package Type bubble change to “Download” after saving. DO NOT CLICK SAVE AGAIN. Instead, just navigate to any other page in the KBOX.

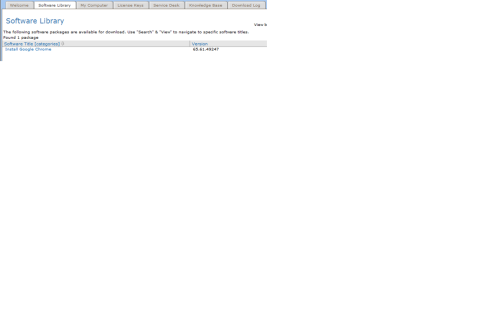
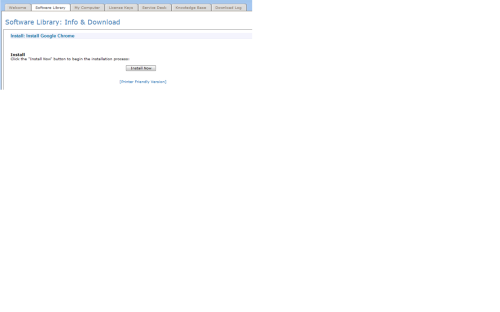
Now that we have the Software setup for deployment, we can take a look at the view from your user portal.
- Log into the user portal
- Click on Software Library and choose the package to be installed.
- Click Install Now
Note: Depending on the size of the program, it may take a few minutes to start. Since this one is small, it usually kicks off in under a minute. Timing will vary depending on size of file and network bandwidth.

Comments