
Create Bootable USB KACE Images
Assumptions
1. The KACE image you’re making USB bootable is over 4GB in size
Pre-Requisites
1. Two flash drives
a. One (1) 16GB or less to support formatting as FAT32
b. One (1) adequate size to fit your image
Create and Download USB Bootable KACE Boot Environment (KBE)
1. Log into your K2 appliance
2. Go to Deployments -> Boot Environments
3. Click on the boot environment you want to create a bootable USB for
4. Select the box: Create bootable USB flash drive image for this Boot Environment
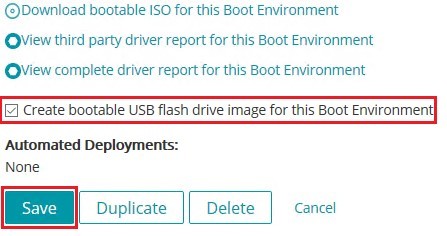
5. Click Save
6. When you click on the boot environment again, it will display a message:
a. A rebuild is currently in progress. This configuration is locked for edit until the process completes. Refresh this page to check for status changes.

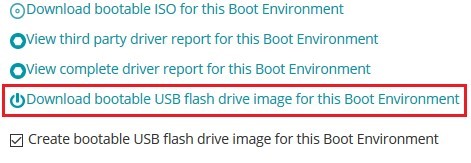
7. The page will refresh itself and then you will have a fourth option:
a. Download bootable USB flash drive image for this Boot Environment
8. Click the option to download bootable USB flash drive image for this Boot Environment
9. You will be prompted to Save, Open, etc., go ahead and save the boot environment to your local machine
Install Boot Image to USB Drive
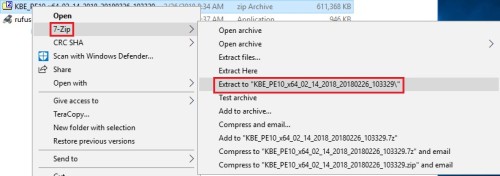
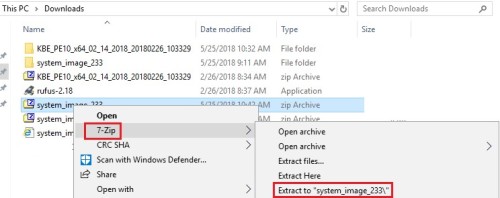
1. Using your favorite zip/rar tool, extract the KBE zip file to a folder
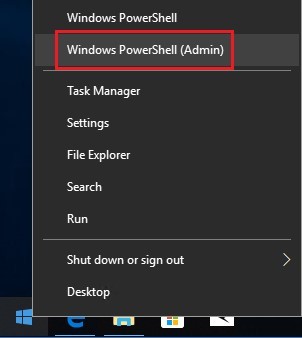
2. Open elevated PowerShell or Command Prompt
a. Start, type cmd, right click Run as Administrator
b. Right click Start, select Windows PowerShell (Admin)
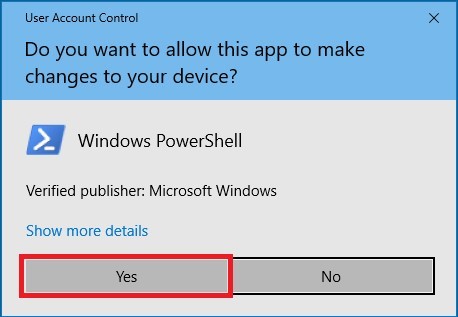
c. Click Yes on the UAC prompt

3. Change Directory to the KBE folder you extracted earlier in step 1

4. Now type: .\install.exe and press Enter

5. The KACE Systems Deployment Appliance UFD Boot Environment Builder appears
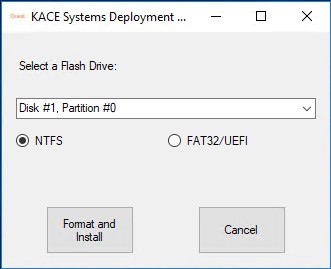
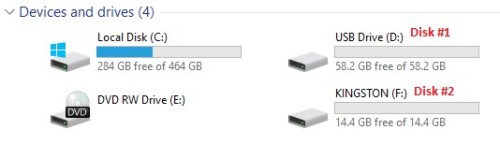
a. NOTE: If you have more than one (1) flash drive plugged in, please check which drive letter is the 16GB or smaller flash drive. If you open explorer and look at the drives, they are listed in order by letter, Disk #1, Disk #2, etc…
6. In my instance, I will want to select Disk #2, Partition #0 and then also select FAT32/UEFI
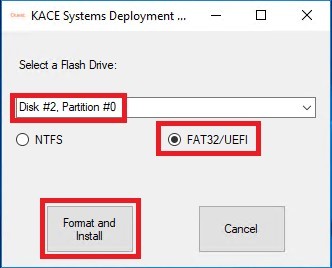
7. Click Format and Install
8. If you watch your windows explorer, you will see the drive go through formatting (FAT32), renaming (K2000), and then the files will be copied to it.
9. Do not do anything until you receive the window that says: “Complete! Please remove the USB safely using the icon in the right-lower corner!”
10. Click OK

11. Eject the flash drive properly
12. Close the KACE Systems Deployment Appliance UFD Boot Environment Builder application
Create and Download USB Bootable System Image
1. Log into your K2 appliance
2. Go to Deployments -> System Images
3. Click on the system image you want to create a USB for
4. Ensure that you have the required Deploy Options selected for your environment:
a. Use driver feed
b. DO NOT have the option: Deploy directly from server selected
c. Click Save to commit changes to the image
5. Go back into the image
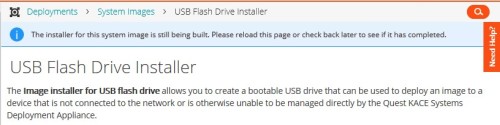
6. Click on: Create bootable USB flash drive image for this System Image
a. You will be given the following information: A background process has been launched to build the installer for this system image. Please reload this page or check back later to see if it has been completed.
b. This time varies on the disk IO the K2 has (physical/virtual KACE,) and the size of the image
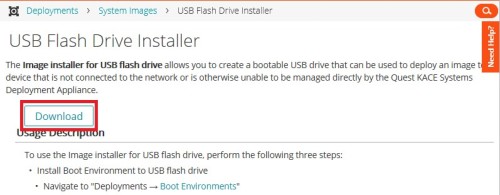
7. After you’ve refreshed the screen you will see a Download button and some usage details
8. Click Download
9. You will be prompted to Save, Open, etc., go ahead and save the system image to your local machine
Install System Image to USB
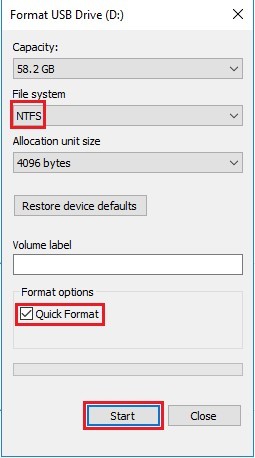
1. NOTE: If your system image is over 4GB, ensure that you format the flash drive as NTFS
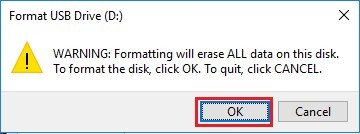
2. At the WARNING window, ensure that is the correct flash drive and then click OK to continue
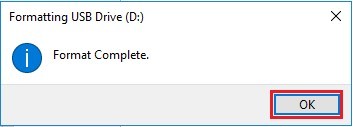
3. Once format is complete you will get the box and click OK
4. Using your favorite zip/rar tool, extract the system image zip file to a folder
5. Open elevated PowerShell or Command Prompt
a. Start, type cmd, right click Run as Administrator
b. Right click Start, select Windows PowerShell (Admin)

c. Click Yes on the UAC prompt
6. Change Directory to the system image folder you extracted earlier in step 1

7. NOTE: Now you need to know the drive letter of the flash drive you’ll be installing the system image to
8. Now type: .\install D: Replace D with the proper letter of your flash drive

a. MAKE SURE you have the colon “:” after the drive letter
b. Press Enter
9. You will see the install.bat file copying the contents from the folder onto the flash drive.
a. DO NOT eject the drive or stop the script during this process. If you do you will need to restart the process.
10. Once the copying is complete, the drive will work. If you need to add the required drivers for the image you’re using, continue to the next section.
Adding Drivers to KACE USB Image
1. Open the flash drive formatted as NTFS with your system image on it
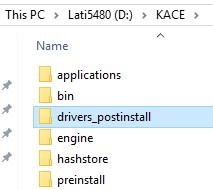
2. Navigate to: D:\KACE and check if drivers_postinstall directory exists. If not, create the folder.
3. Open UNC path to your K2 server: \\k2000\drivers_postinstall
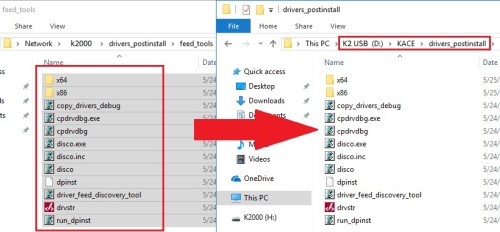
4. Copy the contents from \\k2000\drivers_postinstall\feed_tools to D:\KACE\drivers_postinstall
a. There should NOT be a feed_tools folder on the flash drive
5. In the drivers_postinstall folder, create the folder of the vendor you need, Dell, HP, etc...
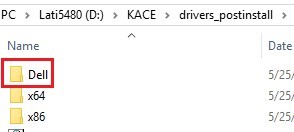
6. Now go into the Dell/Vendor folder
7. Go back to your K2000 share, open the \\k2000\drivers_postinstall directory
8. Go into the vendor folder
9. You will need to make the folder structure identical to the one in KACE on your USB drive
10. So for me, Dell Latitude 5480 on Windows 10 x64.
a. D:\KACE\drivers_postinstall\Dell\windows_10_x64\5480
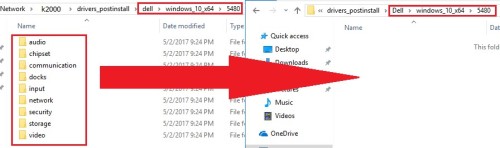
11. Now copy all the drivers from the KACE share to your USB
12. You can safely eject the USB drive
Deploy your Image with Newly Created USBs
1. Connect the USB drive with your KACE Boot Environment (KBE) to the computer you want to image.
a. This is the drive formatted as FAT32.
2. Power on the computer
3. Press the proper key to boot to your one-time boot menu. Ex, Dell press F12
4. If you see the USB removable media, plug in the drive with the KACE Image.
a. This drive is formatted as NTFS
5. If you do not see the KBE USB drive, enter BIOS setup and ensure that USB boot option is enabled
a. Reboot and go back to step 4
6. Now your KBE will appear and it will search for a removeable media with a KACE image on it
7. Once the Image has begun to deploy you can remove the KBE USB drive
8. Once imaging is complete you can remove the USB drive with the image on it
Cited Sources
1. Title: Deploy System Image from USB Drive
2. Title: FAT32 Formatted USB KBE is not able to contain images or files larger than 4gb
3. Title: USB Image Driver Injection
https://support.quest.com/kace-systems-deployment-appliance/kb/111365/usb-image-driver-injection

But it is what it is for UEFI thanks to FAT32, good article sir! Thanks. - Channeler 6 years ago
make sure your KACE appliance has enough free space for this - Channeler 5 years ago
https://support.quest.com/kace-systems-deployment-appliance/kb/334312/create-usb-offline-deployment
NOTE: KACE SDA version 8.2 is required. - Channeler 2 years ago