
Hello,
In the next few steps I will share with you, as to how you should profile Firefox(ver. 13) in citrix xenapp 6.5
Intro:
Firefox, as you all know is a web browser by Mozilla. Most of us have often struggled with the first few screens that come when you launch firefox for the first time after installation. Its really painful to repeat all those steps if you are planning to deploy this application over a network.
Solution:
Firefox creates a profile under %Appdata% (roaming in case of windows 7). Now if you open this folder you will find a folder named mozilla. under this folder you will find the folder Firefox, under this folder you will find a folder named crash reports, profiles and a profiles.ini file. If you open this profiles.ini, you will find the following content in it
[General]
StartWithLastProfile=1
[Profile0]
Name=default
IsRelative=1
Path=Profiles/n9i7r825.default
Now the most important thing in this ini file is the last line highlighted in bold in the above line. open the profile folder in the firectory where the profiles.ini file is present, you will find a folder by exactly similar name as in the above ini file. If you delete this folder firefox will again ask you to configure it, in the same manner it asked you , when you launched the application for the first. So to avoid this make sure you never delete this folder. Now coming to the suppression of updates in the firefox. All the options related to pop up that surface after configuring firefox, updates, sending crash reports, etc.. are stored in prefs.js file. And this is the file that we are looking for. This file is located in following location %AppData%\Mozilla\Firefox\Profiles\n9i7r825.default\prefs.js. Always keep a backup of this file , incase some of you dont wish to configure firefox over and again after installation. Just copy this file in the above mentioned location as soon as the installation is over, and the Firefox would bother you ever for the configuration
How to Profile:
Now what I am about to cover here is pertaining to XenApp 6.5.
1. Open the profiler in the profiling machine
2. Select New profile in the above step
3. Click next
4. name the profile as per your requirement.
5. Click next

6.Click next
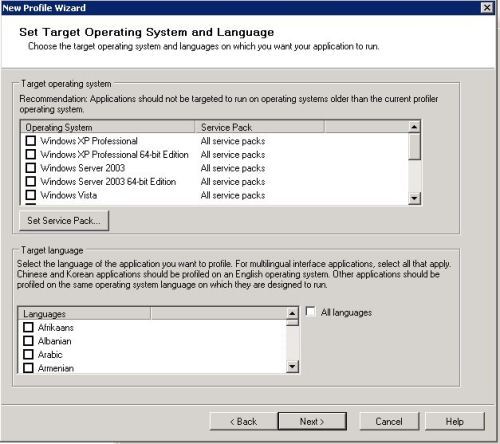
7. Select the platform for which you wish to deploy the application and its language
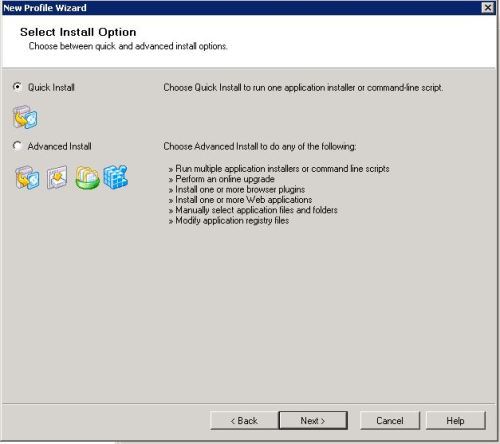
8. now if your installation has just a single installer select the default option else select advanced option and continue with the default option already present on the next screen and click next
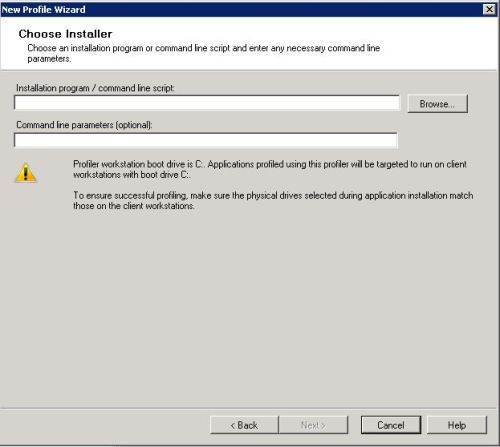
9. Pass the exe and command line arguments if any on this screen and click next
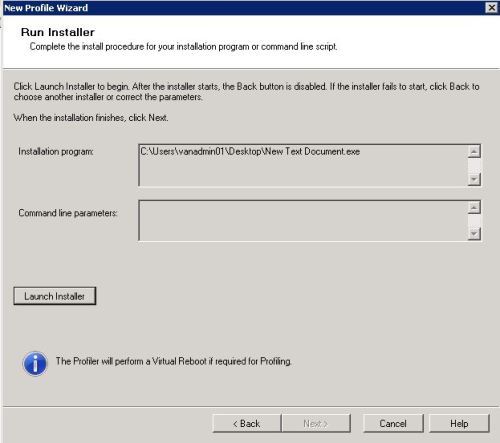
10. Click launch installer. At this stage the installation of firefox would start. Proceed as if you were installing the firefox on your machine. Once done with installation, the next button will get highlighted by itself, click next it will take you to the next screen
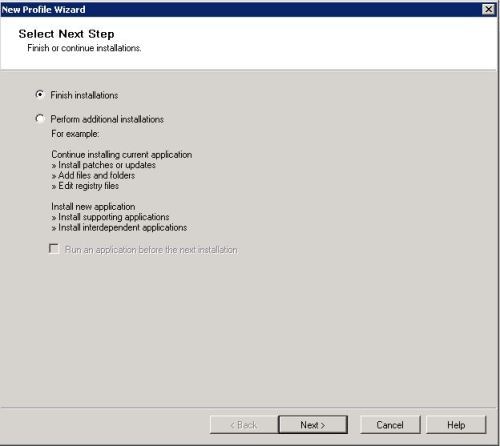
Click next if you dont wish to install other applications alongside firefox and wish to profile those alongwith firefox, in which case you should select the second option. Rest i presume should be easy for all those reading this.
on the next screen the profiler will detect the installed applications by default. if it doesnt it means something went wrong and you need to start profiling again.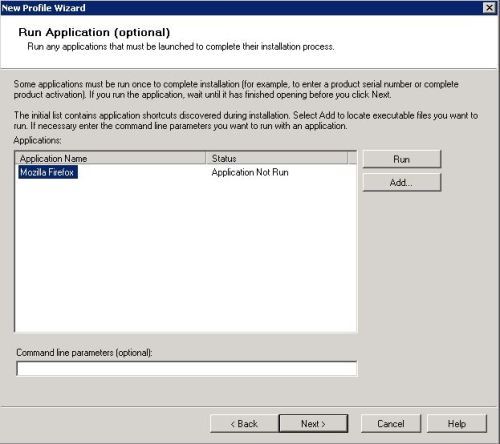
click next once you have run the application.
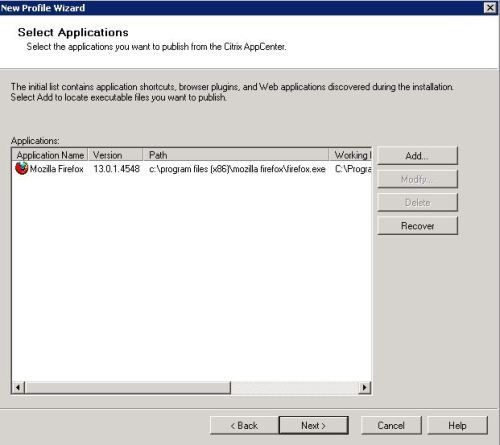
click next on this screen
follow the default settings on the next screen until you reach the final screen where the profiler asks you to build the profile as shown below
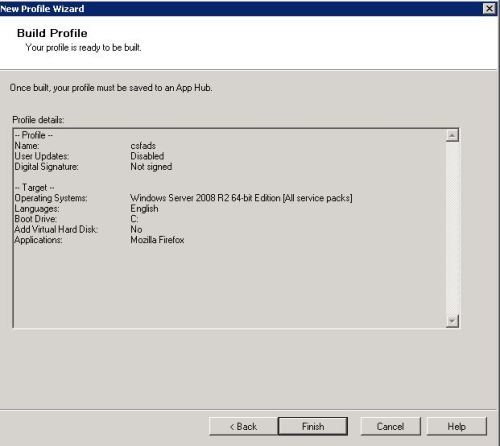
click finish and the profiler will build your profile. Exclusions related to files and folders can be done by opening the .profile file for upgrade. I will cover that later on, right now , dont wish to confuse the audience.
Finishing the application
Now if you'll remember i discussed something about the prefs.js file in the beginning. Yes, now that file comes into file. Now what i didnt tell you was, the xenapp 6.5 doesnt capture user related files , so how do we handle it? At this stage , we need to write a prelaunch vbscript which will copy this file everytime this application is launched
but first let me share with you the contents of prefs.js file
# Mozilla User Preferences
/* Do not edit this file.
*
* If you make changes to this file while the application is running,
* the changes will be overwritten when the application exits.
*
* To make a manual change to preferences, you can visit the URL about:config
*/
user_pref("app.update.auto", false);
user_pref("app.update.enabled", false);
user_pref("app.update.mode", 0);
user_pref("app.update.service.enabled", false);
user_pref("browser.bookmarks.restore_default_bookmarks", false);
user_pref("browser.cache.disk.capacity", 1048576);
user_pref("browser.cache.disk.smart_size.first_run", false);
user_pref("browser.migration.version", 6);
user_pref("browser.places.smartBookmarksVersion", 3);
user_pref("browser.preferences.advanced.selectedTabIndex", 2);
user_pref("browser.rights.3.shown", true);
user_pref("browser.search.update", false);
user_pref("browser.shell.checkDefaultBrowser", false);
user_pref("browser.startup.homepage_override.buildID", "20120614114901");
user_pref("browser.startup.homepage_override.mstone", "13.0.1");
user_pref("browser.taskbar.lastgroupid", "E7CF176E110C211B");
user_pref("extensions.blocklist.pingCountVersion", 0);
user_pref("extensions.bootstrappedAddons", "{}");
user_pref("extensions.databaseSchema", 12);
user_pref("extensions.enabledAddons", "{972ce4c6-7e08-4474-a285-3208198ce6fd}:13.0.1");
user_pref("extensions.installCache", "[{\"name\":\"app-global\",\"addons\":{\"{972ce4c6-7e08-4474-a285-3208198ce6fd}\":{\"descriptor\":\"C:\\\\Program Files (x86)\\\\Mozilla Firefox\\\\extensions\\\\{972ce4c6-7e08-4474-a285-3208198ce6fd}\",\"mtime\":1341981846073}}}]");
user_pref("extensions.lastAppVersion", "13.0.1");
user_pref("extensions.lastPlatformVersion", "13.0.1");
user_pref("extensions.pendingOperations", false);
user_pref("extensions.shownSelectionUI", true);
user_pref("intl.charsetmenu.browser.cache", "UTF-8");
user_pref("network.cookie.prefsMigrated", true);
user_pref("places.history.expiration.transient_current_max_pages", 104858);
user_pref("privacy.sanitize.migrateFx3Prefs", true);
user_pref("services.sync.clients.lastSync", "0");
user_pref("services.sync.clients.lastSyncLocal", "0");
user_pref("services.sync.globalScore", 0);
user_pref("services.sync.migrated", true);
user_pref("services.sync.nextSync", 0);
user_pref("services.sync.tabs.lastSync", "0");
user_pref("services.sync.tabs.lastSyncLocal", "0");
user_pref("toolkit.startup.last_success", 1341982165);
user_pref("toolkit.telemetry.prompted", 2);
user_pref("toolkit.telemetry.rejected", true);
user_pref("urlclassifier.keyupdatetime.https://sb-ssl.google.com/safebrowsing/newkey", 1344569870);
user_pref("xpinstall.whitelist.add", "");
user_pref("xpinstall.whitelist.add.36", "");
the highlighted sections matter the most. If you observe closely, the highlighted lines are self explanatory, if not, let me tell you that those lines , will suppress automatic updates and automatic search engine updates.
now comes the the prelaunch vbscript file, but before that, did i tell you where you should keep this file , so that prelaunch.vbs copies this file everytime it runs in user. For that , open the .profile file generated in the above profiling steps.
refer the image below
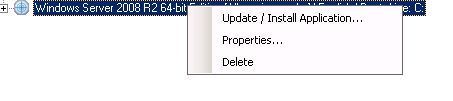
click update/install application , so that we can add file. click next on the screen that appears
on the next screen , select advanced install, and click next. On the next screen , select "select files and folders radio button" and click next. it will take you to the following screen
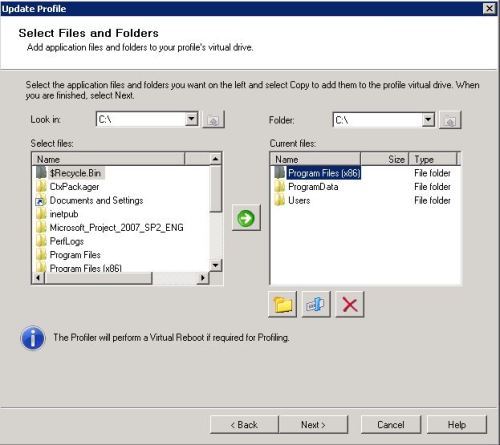
the left hand section designates the files on the machine and the right hand section designates the file in the profiled application. Now in the left hand section, navigate to the desktop folder(i presume that should not be difficult ) Once on desktop folder, add that folder to the captured installation directory of firefox(u can keep the file anywhere in the captured directories, but i prefer INSTALLDIR). once the file is added , click next. On the next screen, select finish application and click next. again you will be presented with the screen asking you to run the application. Run the application and follow on screen instruction.When done , follow the default options on the screen untill you get the screen which asks you to build the profile and Voila!! you are done adding the file
Now lets write our vbscript file. Use the following content. I dont own any of the following content. Nor am i a very good scripter, but can write everyday scripts that can get the work done.
======================================================================
Option Explicit
On Error Resume Next
Const OVERWRITE_EXISTING = True
Dim objShell, objFso, struserpath, filepath, strCD, cmd, strAppdata, strSource1, strSource2, strDest, strDest1, strDest2, strDest3, strMicro, strFile
Set objShell=wscript.CreateObject ("wscript.Shell")
Set objFso=CreateObject ("Scripting.FileSystemObject")
strAppdata = objshell.expandenvironmentstrings("%appdata%")
strCD = objshell.expandenvironmentstrings("%ProgramFiles(x86)%")
strSource1 = strCD & "\Mozilla Firefox\profiles.ini"
strSource2 = strCD & "\Mozilla Firefox\prefs.js"
strMicro = strAppdata & "\Mozilla\"
strDest1 = strAppdata & "\Mozilla\Firefox\"
strDest2 = strAppData & "\Mozilla\Firefox\Profiles\"
strDest3 = strAppData & "\Mozilla\Firefox\Profiles\382pmpjp.default\"
strFile = strAppdata & "\Mozilla\Firefox\Profiles\382pmpjp.default\prefs.js"
If Not objFSO.FolderExists( strMicro ) Then
objFSO.CreateFolder strMicro
End if
If Not objFSO.FolderExists( strDest1 ) Then
objFSO.CreateFolder strDest1
End if
If Not objFSO.FolderExists( strDest2 ) Then
objFSO.CreateFolder strDest2
End if
If Not objFSO.FolderExists( strDest3 ) Then
objFSO.CreateFolder strDest3
End if
If Not objFSO.FileExists( strFile ) Then
objFso.CopyFile strSource1 , strDest1
objFso.CopyFile strSource2 , strDest3, OVERWRITE_EXISTING
End if
Set objShell= nothing
Set objFso= nothing
======================================================================
Save this file by anyname.vbs
Now how to add this script to our profile?
again refer the following options

This time click properties and you will get the following screen
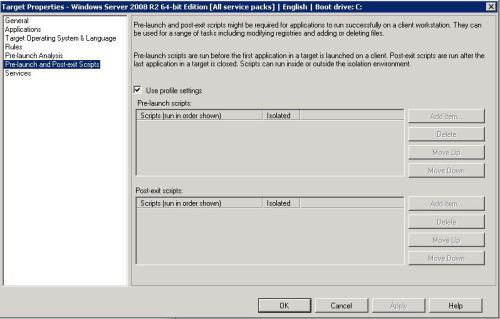
select the highlighted section. Uncheck the use profile settings. this will open up the prelaunch & Post exit scripts section.
Click Add. browse to the directory where you have kept your vbs file. Do not change any other option on the window unless you are sure about it. Once done adding the file, click apply and ok and save the profile on desktop. and you are done. Now when you publish this application you will no longer get the same configuration windows and also the auto update will be disabled.
Do let me know if in case, someone finds any difficulty in the above mentioned steps

can u please suggest how to disable manage add-ons in firefox. - tanoo tomar 11 years ago
I've tried to add the script to the package, but I receive an vbs script error, can you pls.help me, Thanks - testa19 9 years ago