
I have seen a few questions and posts about using the KBE Manipulator for common boot cds (Hiren's, DBAN, MemTest86+, etc.). These were very helpful when we were trying to implement a wipe method for our K2000. We used Norton Ghost previously, and it was fully automated. When I set out to duplicate this in the K2000, I was able to get DBAN uploaded rather easily using KBEM, but automating it turned out to be a little more difficult. However, the end result is a K2000 boot environment that can be set up as an automated deployment to fully wipe any connected hard drives using any wipe method supported by DBAN. Enjoy!
QUICK DISCLAIMER:
The result of this article will provide you with a very simple and easy to deploy method for securely wiping hard drives. However, with this ease comes the risk of accidental data loss. I assume no responsibility for any possible data loss or other detrimental circumstances brought about by the use of this how-to article.
Also, know that DBAN has a commercial counterpart called Blancco that has a very rich feature set, and natively supports a PXE delivery method. See a full comparison here: http://dban.org/download. However, DBAN is still completely free, even when used commercially (I called Blancco to confirm this). It should be noted that I checked this almost a year ago now, so it would be prudent to ensure that their policies haven't changed periodically to avoid audit issues. I assume no responsibility for possible audit failures or other legal issues brought about by using this software at your home or place of business. The responsibility for ensuring license and audit compliance at your home or place of business falls solely on the reader.
I digress. Here we go...
Prerequisites
1. The Darik's Boot and Nuke ISO - http://dban.org/.
2. CDRTools 4 Windows - https://sourceforge.net/projects/cdrtoolswin/
WARNING: When CDRTools 4 Windows installs, it tries to add a statement to the PATH environment variable. However, instead of adding this statement, it replaces the entire PATH environment variable. Before installing this, make sure to make a backup of your current PATH, then install the program, and then paste the pre-existing PATH back. Also, on 64-bit machines, you will need to change the cdrtools path statement to C:\Program Files (x86)\crdtools instead of C:\Program Files\crdtools.
If you can run “mkisofs –help” (no quotes) from the command line, then it is properly set up.
The only needed files are mkisofs.exe and cygwin1.dll, so if you can get these from elsewhere, feel free to just throw them in C:\Windows\system32.
3. KBE Manipulator - https://support.software.dell.com/download-install-detail/6067030 (see this article for more info http://www.itninja.com/question/kbe-manipulator)
How-To
First, extract the contents of the DBAN ISO to a folder of your choosing using WinRar or any other method of extracting files from an ISO.
Now we have a folder with all of the contents of the iso.
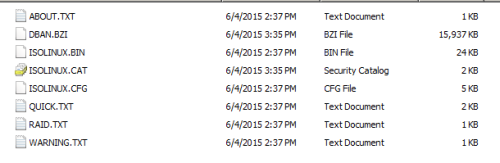
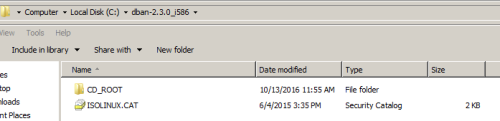
Take the extracted files and put them in a subdirectory called CD_ROOT (or a name of your choosing) EXCEPT for ISOLINUX.CAT.
We are only concerned with ISOLINUX.CFG.
Open this file in your favorite text editor.
It contains quite a few helpful notes, and thankfully, it is fairly straightforward to configure for automatic wiping.
Below are the only two settings we need to change. See the comments above the setting for more info.
# Set this option to zero if you wish to skip the boot prompt.
PROMPT 1
# This label will be started if you just push enter at the boot prompt, or if
# you set the PROMPT option above to zero.
DEFAULT dban
The first change is to set PROMPT to 0 instead of 1.
The second configuration selects the default Wipe label to use. The CFG file has multiple pre-configured labels. either replace the label name with one from the cfg or create your own.
Some explanation on this:
1. The very bottom of the CFG file has syntax help (see in bold below).
2. The dwipe methods that have two different names (dodshort dod3pass, quick zero, prng random) mean the same thing. So the quick label and the zero label will function exactly the same.
3. The default label “dban” will open the main menu (which defeats the purpose here).
4. The autonuke label runs the dodshort wipe method on all connected drives.
5. To build your own label, simply copy an existing label and edit the LABEL and APPEND parameters.
For example:
LABEL custom
KERNEL dban.bzi
APPEND nuke="dwipe --autonuke --method dod522022m --rounds 2 --verify 1" silent vga=785
# The Boot Prompt
# ---------------
#
# Usage: [label [kernel options] [nuke="dwipe [dwipe options]"]]
#
# Dwipe Options:
#
# --autonuke Be really sure.
# -m --method The wipe method to use.
# -r --rounds The number of times to run the method.
# --verify The verification level.
#
# Dwipe Methods:
#
# dod522022m American Department of Defense 5220.22-M standard wipe.
# dodshort dod3pass DoD short wipe, passess 1,2,7 from the standard wipe.
# gutmann Peter Gutmann's wipe.
# ops2 RCMP TSSIT OPS-II standard wipe.
# prng random PRNG stream wipe.
# quick zero Quick erase.
#
# Verification Levels:
#
# 0 off Do not read anything back from the device.
# 1 last Check whether the device is empty after wiping.
# 2 all Check whether all passes were written properly.
#
# Notes:
#
# * The rounds option does not apply to to the quick method. This method
# always runs one round.
#
# * Use at least four rounds with the prng method. Using eight rounds with
# the prng method is recommended.
#
# * The last pass of every method fills the device with zeros, except the
# ops2 method which fills the device with a random stream on its last pass.
#
After configuring those two options and any additional labels as you see fit, save the .CFG file to the same directory with the same name.
At this point, we need to remaster the ISO.
WARNING: Make sure to read the above note about CDRTools before continuing.
Make sure to install CDRTools 4 Windows. It installs to C:\Program Files (x86)\cdrtools.
This will add multiple Linux CD command-line tools.
Now all we need to open a command prompt and cd to the directory with ISOLINUX.CAT. If UAC is turned on, then make sure to Run as Administrator.
Now run the following command replacing the paths with your own (remove the brackets):
mkisofs.exe -R -o [OUTPUT PATH\FILENAME.iso] -b ISOLINUX.BIN -c ISOLINUX.CAT -no-emul-boot -boot-load-size 4 -boot-info-table [EXTRACTED ISO FILES PATH]
Example: mkisofs.exe -R -o C:\dban-2.3.0_i586\K2000DBAN.iso -b ISOLINUX.BIN -c ISOLINUX.CAT -no-emul-boot -boot-load-size 4 -boot-info-table C:\dban-2.3.0_i586\CD_ROOT
If any of your paths contain spaces, then make sure to enclose them in double quotes.
This will create a new, remastered ISO file and place it in the directory specified in the command.
This is the ISO we will use to upload to the K2000.
Credit to NEC from this post for this. https://sourceforge.net/p/dban/discussion/208932/thread/d82b61fd/
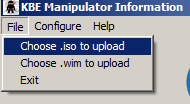
Now open the KBE Manipulator, and type in the information for your K2000.
Make sure to name the KBE as well.

Now go to File – “Choose .iso to upload”, and browse to and select the .iso file from mkisofs command.
Now click Create KBE. This will upload the ISO as a Boot Environment to the K2000.
That’s it! Now feel free to create automated deployments, etc.
I actually set up three different deployments – one that does a DOD 3-Pass, one that does a DOD 7-pass, and one that does a quick wipe of zeros.
Enjoy!

https://support.software.dell.com/k2000-systems-deployment-appliance/kb/154645 - Nico_K 7 years ago