
K2000 - Static System Image Deployment - Step by Step guide requested
Hi All
We want to use K2000 for depoying static images for various reasons. We thought its a matter of capturing a master image and deploy the image to the same spec of hardware.
But its its not working somehow. For Example, I am capturing Dell Latitude E6410 image to K2000 with specefic systems settings company wants... After image is captured , image is apprearing in K2000 - Deploymets - System Images. Then when we try to deploy the image on to different E6410 machine, K2000 displays message image depoyed successfully but its not the case after checking.
Are we missing something over here?
Could anyone provide step by step guide to capture and deploy static system images from K2000.
Many Thanks
5 Comments
[ + ] Show comments
Answers (2)
Answer Summary:
Please log in to answer
Posted by:
SMal.tmcc
9 years ago


If you restart the master machine after your did the capture does it come out of sysprep OK? If it does it probably missing drivers on the target machine. If it does not most likely something is incorrect in your answer file.
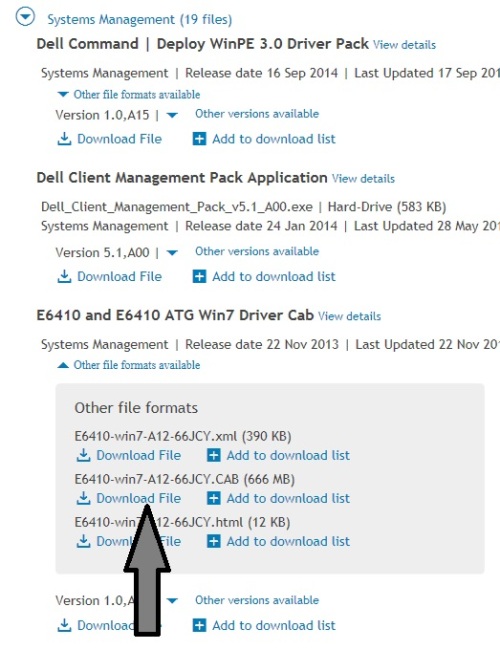
For this I am going to use windows 7 32bit for the OS version, if it is not just go get the proper driver pack. You can enable the driver feed on the k2000, but I have had much better success with this method.
Go to dell support and download the driver cab pack (this contains all the drivers the machine needs when it comes out of sysprep). Expand that with using 7-zip to a directory and subdirectories. place that structure in c:\windows\inf on the master prior to sysprep.
If it is your answer file, here is one of mine. (the product key is the kms key)
<?xml version="1.0" encoding="utf-8"?>
<unattend xmlns="urn:schemas-microsoft-com:unattend">
<settings pass="specialize">
<component name="Microsoft-Windows-Deployment" processorArchitecture="x86" publicKeyToken="31bf3856ad364e35" language="neutral" versionScope="nonSxS" xmlns:wcm="http://schemas.microsoft.com/WMIConfig/2002/State" xmlns:xsi="http://www.w3.org/2001/XMLSchema-instance">
<RunSynchronous>
<RunSynchronousCommand wcm:action="add">
<Path>net user administrator /active:yes</Path>
<Order>1</Order>
</RunSynchronousCommand>
</RunSynchronous>
</component>
<component name="Microsoft-Windows-Shell-Setup" processorArchitecture="x86" publicKeyToken="31bf3856ad364e35" language="neutral" versionScope="nonSxS" xmlns:wcm="http://schemas.microsoft.com/WMIConfig/2002/State" xmlns:xsi="http://www.w3.org/2001/XMLSchema-instance">
<CopyProfile>true</CopyProfile>
<ShowWindowsLive>false</ShowWindowsLive>
<TimeZone>Pacific Standard Time</TimeZone>
<ProductKey>33PXH-7Y6KF-2VJC9-XBBR8-HVTHH</ProductKey>
<TaskbarLinks>
<Link0>%ALLUSERSPROFILE%\Microsoft\Windows\Start Menu\Programs\Mozilla Firefox.lnk</Link0>
<Link1>%ALLUSERSPROFILE%\Microsoft\Windows\Start Menu\Programs\Google Chrome.lnk</Link1>
</TaskbarLinks>
<WindowsFeatures>
<ShowInternetExplorer>true</ShowInternetExplorer>
<ShowMediaCenter>true</ShowMediaCenter>
<ShowWindowsMediaPlayer>true</ShowWindowsMediaPlayer>
</WindowsFeatures>
</component>
<component name="Microsoft-Windows-IE-InternetExplorer" processorArchitecture="x86" publicKeyToken="31bf3856ad364e35" language="neutral" versionScope="nonSxS" xmlns:wcm="http://schemas.microsoft.com/WMIConfig/2002/State" xmlns:xsi="http://www.w3.org/2001/XMLSchema-instance">
<DisableFirstRunWizard>true</DisableFirstRunWizard>
<DisableWelcomePage>true</DisableWelcomePage>
</component>
<component name="Microsoft-Windows-UnattendedJoin" processorArchitecture="x86" publicKeyToken="31bf3856ad364e35" language="neutral" versionScope="nonSxS" xmlns:wcm="http://schemas.microsoft.com/WMIConfig/2002/State" xmlns:xsi="http://www.w3.org/2001/XMLSchema-instance">
<Identification>
<JoinWorkgroup>tmccacad.tmcc</JoinWorkgroup>
</Identification>
</component>
</settings>
<settings pass="oobeSystem">
<component name="Microsoft-Windows-International-Core" processorArchitecture="x86" publicKeyToken="31bf3856ad364e35" language="neutral" versionScope="nonSxS" xmlns:wcm="http://schemas.microsoft.com/WMIConfig/2002/State" xmlns:xsi="http://www.w3.org/2001/XMLSchema-instance">
<InputLocale>en-us</InputLocale>
<SystemLocale>en-us</SystemLocale>
<UILanguage>en-us</UILanguage>
<UserLocale>en-us</UserLocale>
</component>
<component name="Microsoft-Windows-Shell-Setup" processorArchitecture="x86" publicKeyToken="31bf3856ad364e35" language="neutral" versionScope="nonSxS" xmlns:wcm="http://schemas.microsoft.com/WMIConfig/2002/State" xmlns:xsi="http://www.w3.org/2001/XMLSchema-instance">
<OOBE>
<HideEULAPage>true</HideEULAPage>
<NetworkLocation>Work</NetworkLocation>
<ProtectYourPC>3</ProtectYourPC>
</OOBE>
<UserAccounts>
<LocalAccounts>
<LocalAccount wcm:action="add">
<Password>
<PlainText>false</PlainText>
<Value>Vklasdfjg;axxxxxxxxxxxxxxxxxxxxxxcwB3AG8AcgBkAA==</Value>
</Password>
<DisplayName>F13Master</DisplayName>
<Name>F13Master</Name>
<Group>Administrators</Group>
</LocalAccount>
</LocalAccounts>
<AdministratorPassword>
<PlainText>false</PlainText>
<Value>Vklasdfjg;axxxxxxxxxxxxxxxxxxxxxxcwB3AG8AcgBkAA==</Value>
</AdministratorPassword>
</UserAccounts>
<RegisteredOrganization>tmcc</RegisteredOrganization>
<RegisteredOwner>staff</RegisteredOwner>
<AutoLogon>
<Password>
<Value>Vklasdfjg;axxxxxxxxxxxxxxxxxxxxxxcwB3AG8AcgBkAA==</Value>
<PlainText>false</PlainText>
</Password>
<Enabled>true</Enabled>
<LogonCount>3</LogonCount>
<Username>installer</Username>
</AutoLogon>
</component>
</settings>
<settings pass="generalize">
<component name="Microsoft-Windows-Shell-Setup" processorArchitecture="x86" publicKeyToken="31bf3856ad364e35" language="neutral" versionScope="nonSxS" xmlns:wcm="http://schemas.microsoft.com/WMIConfig/2002/State" xmlns:xsi="http://www.w3.org/2001/XMLSchema-instance">
<OEMInformation>
<HelpCustomized>true</HelpCustomized>
<Manufacturer>TMCC Helpdesk</Manufacturer>
<SupportHours>8 - 5</SupportHours>
<SupportPhone>673-7800</SupportPhone>
<SupportURL>http://www.tmcc.edu/ito/contact/</SupportURL>
<Model>Computer Support</Model>
</OEMInformation>
</component>
</settings>
<cpi:offlineImage cpi:source="catalog:c:/w7image/install_windows 7 enterprise.clg" xmlns:cpi="urn:schemas-microsoft-com:cpi" />
</unattend>
Comments:
-
I have downloaded the cab file and put them at the location you mentioned. And Yeah, It works :). Many Thanks. - raxit.patel 9 years ago
-
I do that for all my images. I stage the drivers for all of the models that image would be placed on.
I have one 64 and one 32 bit image for the 5 different desktop and 6 different laptop admin machines in the field, do not need to harvest or configure the driver feed. - SMal.tmcc 9 years ago-
Image is working fine now after sysprep. Though Keyboard layout is changed to US. I want to change it to UK. For sysprep i have used sysprep creator from KACE and there are no options for UK. Is there a way to change the regional options during the postinstall task. - raxit.patel 9 years ago
-
I just installed sysprep creator, I see what you mean about no UK. I will email one of the K2000 Engineers and ask about this. For now just create your unattend.xml with the creator and save it as US english. After your create it open the xml with notepad and replace as shown:
<component name="Microsoft-Windows-International-Core" processorArchitecture="amd64" publicKeyToken="31bf3856ad364e35" language="neutral" versionScope="nonSxS" xmlns:wcm="http://schemas.microsoft.com/WMIConfig/2002/State" xmlns:xsi="http://www.w3.org/2001/XMLSchema-instance">
<InputLocale>en-US</InputLocale>
<SystemLocale>en-US</SystemLocale>
<UILanguage>en-US</UILanguage>
<UILanguageFallback>en-US</UILanguageFallback>
<UserLocale>en-US</UserLocale>
</component>
<component name="Microsoft-Windows-International-Core" processorArchitecture="amd64" publicKeyToken="31bf3856ad364e35" language="neutral" versionScope="nonSxS" xmlns:wcm="http://schemas.microsoft.com/WMIConfig/2002/State" xmlns:xsi="http://www.w3.org/2001/XMLSchema-instance">
<InputLocale>en-UK</InputLocale>
<SystemLocale>en-UK</SystemLocale>
<UILanguage>en-UK</UILanguage>
<UILanguageFallback>en-UK</UILanguageFallback>
<UserLocale>en-UK</UserLocale>
</component> - SMal.tmcc 9 years ago
Posted by:
cserrins
9 years ago

Kace official System Imaging Best Practices
Corey
Lead T3 Enterprise Solutions Consultant, K2000

http://www.kace.com/support/training/kke/archive?product=k2000&language=en - SMal.tmcc 9 years ago
But when i check Harddrive it is still in the same format I began to deploy the image, So image is not applying correcly.
Please note Iam not syspreping the image. I am making the workstation ready with the settings we want, then capure the image in k2000. And to test we try to deploy the image on same spec of workstation and this issue occurs... - raxit.patel 9 years ago
They are a little old, I have made changes for Kace 3.6, will post that soon.
http://www.itninja.com/blog/view/windows-7-image-process-for-the-college-s-classrooms
http://www.itninja.com/blog/view/creating-a-windows-7-sysprep-image-without-having-to-install-any-drivers-at-post-install-tasks - SMal.tmcc 9 years ago