
Because Dell KACE appliances use a PHP web interface they are unfortunately limited to 2 GB (or 1.5 GB depending on the browser) file uploads. See http://www.kace.com/en-gb/support/resources/kb/article/how-to-get-around-the-1-5gb-upload-image-deployment-kbox2000
Although this limitation is not directly Dell’s fault, in my opinion they should have a supported method of upload to the appliance. I am sure I am not the only customer that has this requirement.
The supported work around is to create a separate file server to house the payload. In my opinion, this is unacceptable because it creates another fail point.
Fortunately there is a work around but I have found the documentation scarce. Probably because it can be a long process. I hope this guide can save you enough time so that it will be worthwhile. In my case, I spend too many hours troubleshooting and talking to Dell that the benefit of housing the payload on the appliance did not out way the administrative cost.
This guide will walk you through creating a large ‘Post Installation Task’ on a K2000 series KACE appliance. It is very similar to doing the same on a K1000 series. On the K1000 you would create a ‘Managed Install’ instead.
Here is the basic run down of what will be performed:
- Create a dummy/fake payload smaller than 2GB and ZIP it
- Create a dummy/fake post installation task with the fake payload
- Export the new task and copy it to your computer
- Modify the package, inserting the real payload
- Copy it back to the appliance and import it
To complete this tutorial you will need a Windows computer and 7-zip. 7-zip can be downloaded from here: http://www.7-zip.org. This tutorial assumes it is already installed.
1. Create a fake payload
In this step you need to create a fake payload. In the example I created a folder called ‘Fake’.

Inside there I created a text file called ‘installdummy.txt’. You can call it whatever you want. Just make sure it’s small than 1.5GB.

ZIP it then rename it. It is important that you rename the ZIP file to whatever you will call the real payload later in the tutorial.

2. Create a fake Post Installation Task
Log into the KACE appliance and create a new Post Installation Task. Upload the dummy payload ZIP file you created in the previous step. Note that the file size in the example is as small as 130 bytes.
IMPORTANT: The dummy payload ZIP that you upload in this step must have the same file name as you want the real payload to be.

3. Export task
Go to ‘Settings & Maintenance’, then ‘Package Management’ then ‘Export K2000 Packages’. Locate your newly created task, using the search function if needed. Tick the selection box on the ‘Post Installation Task’ and choose ‘Export Selected’ from the ‘Choose Action’ drop down list.

This will create a package in the SMB share on the K2000. Large tasks can take a while to generate but because I payload is small it should almost be instant.
Open Windows Explorer and navigate to \\<IP address or DNS name of K2000>\restore
For example: \\ikbox\restore
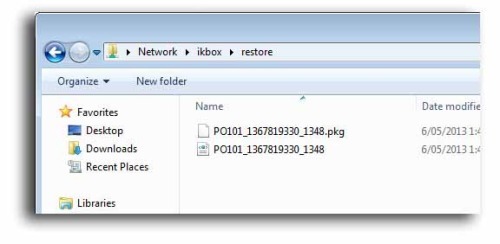
Copy the PKG file to your local hard drive.
4. Modify the package file
ZIP the real payload. Using Windows to create the archive will work fine.

Rename the ZIP file to the same as the fake payload ZIP created earlier. For example: ‘adobecs6.zip’
Right-click the PKG that your copied from the K2000 and select ‘7-ZIP’ à ‘Open archive’.

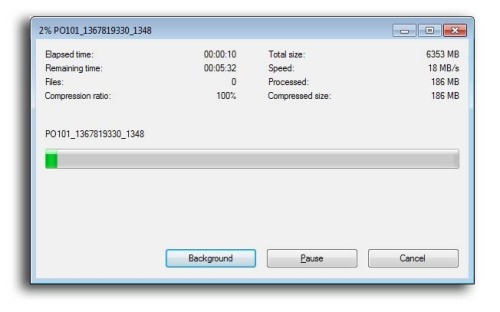
Open randomly generated folder (for example: PS101_1367819330_1348) then ‘.’ (dot) then ‘PAYLOAD’. You will then see the dummy ZIP file.
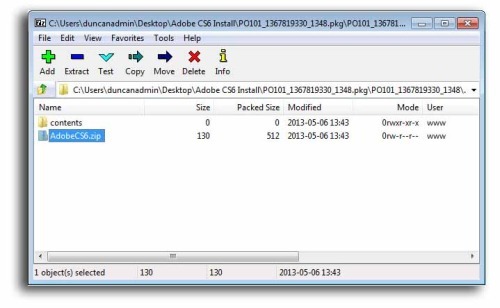
Delete it. Then copy the new LARGE payload ZIP to the ‘PAYLOAD’ directory in the PKG file in 7-Zip. I find the best way is to ‘drag-and-drop’.

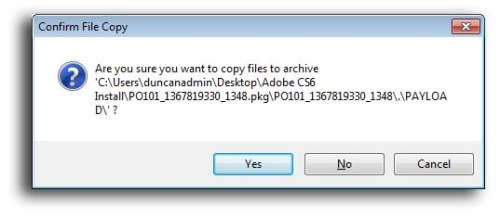
You will be prompted to confirm the copy. Accept ‘Yes’.
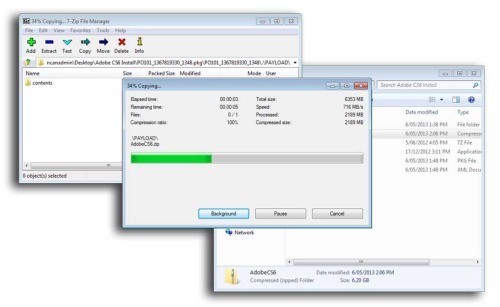

Once it has copied it appears as though the job is complete but you have to close 7-Zip and say ‘OK’ to save the changes.
Saving the changes takes a long time depending on the size of the payload.
5. Import the PKG into the appliance
Copy the PKG file back into the SMB share on the K2000, overwriting the original. For example \\ikbox\restore
Before importing the new PKG file you will need to delete the original dummy Post Installation Task from within the web interface. If you do not, you will end up with two tasks: the dummy one and real one.
On the K2000 web interface navigate to ‘Settings & Maintenance’ à ‘Package Management’ à ‘Import K2000 Packages’.

Notice the payload is very large in the import screen. Tick the selection box on the left and ‘Import Selected’ from the ‘Choose Action’ drop down box.
The KACE applicance will take a while to import the package. In the top-right hand of the screen it will say what is it up to. When it is finished it while say ‘Currently: Idle’.

All done. You can now deploy your application to your clients. You should also delete the PKG file from the SMB share to free up space.
Note: If you look at the task from the web interface, you may notice KACE reports the original small file size. KACE is lying to you. It really is large.

When I deploy my image with the post task I am getting K2000 post-install task error "The system cannot find the file specified." for autocad.
I went to autocad task ID folder (C:\KACE\Application\Autocad Task ID folder) on loca machine and it only contain the dummy text file. Ay suggestion will be greatly appreciated. Here is the command line I am using for the autocad package which works flawless through command line.
"Img\Setup.exe" /qb /I Img\Autocad 2015.ini /language en-us - ravikumar908 9 years ago
In summary you still need the .zip in the payload folder along with all the uncompressed files in the payload --> contents folder. - carminus 8 years ago
Regarding changes in the newer versions of KACE I found that you can just put the real contents of the large file in the "Contents" folder and leave the zip file as the small fake zip file. This way you aren't doubling the size of the task. It works this way for me. - dan.jacobson@tapad.com 7 years ago
The import packages shows the much larger package size (2.8gb), but the imported post-install task is 128B. :( - wafflesmcduff 7 years ago
The peinst share is hidden so you need to mount it directly \\kace2000\peinst, using your K2's hostname. - chucksteel 7 years ago
I'm trying leaving the 1KB .zip file alone and putting the contents of the real zip file into the contents folder. Let's see how that goes. - wafflesmcduff 7 years ago
Creating a large post-install task
Most browser will not allow uploads of greater than 2GB. This limitation makes creating post-install tasks on the K2000 difficult if the zip file exceeds that limit. There is a way to get around this limitation, however. You will need 7-Zip installed on your computer to complete these tasks.
In this example I will be creating a large post-install task using Adobe Illustrator version 20.0.0 as my example. The same technique can be used for other applications but may require you to determine which files to exclude from the initial upload to the K2000.
1. Create a folder on your computer that contains all of the application files needed for the post-install task, e.g. c:\temp\Illustrator20.0.0.zip
2. Move large files from the folder to another location. In the case of Adobe CC apps the HD folder contains the bulk of the program files, so I generally move that folder to c:\temp\hd
3. Select the remaining files in the folder and compress them into a zip file by right clicking then selecting Send To, Compressed (zipped) folder.
4. Name the zip file appropriately, e.g. Illustrator20.0.0.zip
5. On the K2000 create a new post-install task as you normally would and upload the zip file you just created.
6. On the K2000 click Settings, Package Management, Export Packages
7. Locate the post-install task that you just created in the list and check the box to select it
8. Click Choose Action, Export Selected
9. The page should refresh and the status of the K2000 in the upper right should show that the package is being exported
10. Once the status returns to Idle open window to \\kace2k\restore
11. There should be two files exported, a pkg and an xml. The names should begin with PO# where the # is the ID of the post-install task.
12. Copy the pkg file to your computer.
13. Right click on the pkg file and open it in 7-Zip
14. You can browse the contents of the package file in the 7-Zip interface. The top level folder should be the name of the file, then a dot, then payload and finally contents.
15. Open a file explorer window and locate the folder you removed previously, e.g. c:\temp\hd
16. Drag the folder into the 7-Zip window
17. 7-Zip will confirm that you want to copy the files into the archive.
Click Yes
18. The contents folder should now include the folder you copied, e.g. HD
19. Close 7-Zip.
You should be prompted to update the contents of the archive.
20. Copy the package file back to the \\kace2k\restore share replacing the original file
21. On the K2000 delete the post-install task you created in step 5.
22. Click Settings, Package Management, Import K2000 Packages
23. Check the box next to the package that you updated and copied to the server
24. Click Choose Action, Import Selected
25. The page should refresh and the status of the K2000 in the upper right should show that the package is being exported
26. Once the status returns to Idle your package has been imported.
27. Click Library, Post-Installation Tasks and verify that it is there.
NOTE: The file size listed for the task will not be updated and will reflect the size of the original file that was uploaded in step 5. - chucksteel 7 years ago
I have never had an install that large (8 to 10 GB) with multiple files and I'm not sure what I would do in that case. Probably install from a network share would be the best route. - chucksteel 6 years ago