
It has been a while since I wrote an article about a packaging tool. Since Wise Package Studio has been taken off the market and AdminStudio is not seeing considerable competition as the leading enterprise solution, I thought it worth highlighting some of what I’ve learned about a relatively new entry to the market: RayPack
At the industry’s annual Application Management Event (“AppManageEvent”), many application management vendors and solution providers come together to present their latest and this was where I first became aware of Raynet. They are a company new to selling it’s own software, but a veteran in the Application Management space. I tracked their offering from its beginnings as a solution provider’s internal toolset through its evolution to a mature product offering. In my role running Product Management for Dell KACE, I would later arrange for a special edition of the product to be provided to Dell KACE customers. So read on knowing I’m a fan of the product and its potential ;-)
Introduction
Raynet has been in the application packaging business for over 15 years, in the first 10 years focused on packaging services for large migration projects and packaging factories around the world. They’ve leaned on this experience and knowledge to develop a set of tools to manage the full enterprise application lifecycle.
RayPack is their software packaging solution and is the component I’ll be focusing on for the purposes of this article.
About RayPack
According to Raynet, RayPack has been developed “by packagers for packagers”, and it is safe to say that it provides all the features you would expect from an enterprise packaging solution.
The initial market launch was less than 2 years ago with version 1.0, and like most initial product releases, it was far from perfect. Nonetheless, with a dedicated development team and community-driven roadmap, Raynet has made the improvements and enhancements you would expect with each release.
In examining it’s current set of features and functionality, I’ve focused on the official trial version of the current 1.4 Enterprise release, including the virtualization pack. The free demo with a 10 days license is available by registering online.
Installation
I installed RayPack on a clean Windows 7 workstation (32bit) (support is available from Windows XP up to 8.1 / 2012 R2). The only prerequisite for RayPack is the .NET Framework 4.0. Hardware requirements are not that demanding at 2 GB of RAM as a minimum, but naturally 4 GB is recommended.
There are 3 types of installations to choose from: typical, stand-alone (for repackaging only) and custom. I choose the typical.
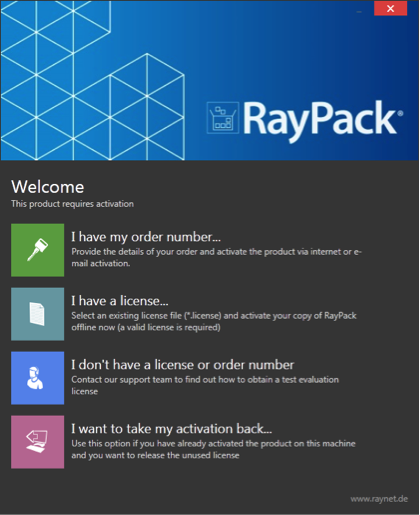
RayPack must be activated before it can be used. There are two methods of activation, online or via email. I chose the online method, and after a few seconds I was able to start RayPack. The email activation is only required if there is no internet connection available. The licensing is bound to the machine, and not to a user, so on a packaging machine this means I can use both an administrative account and a normal user account to operate RayPack without the need for extra licenses.
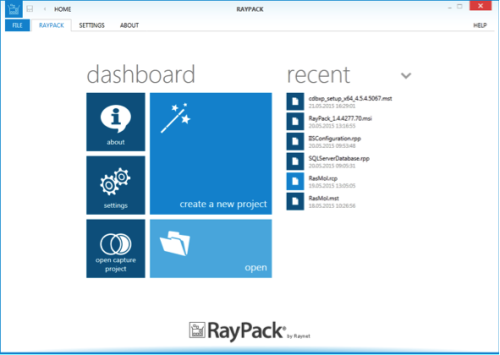
Dashboard
Everything in RayPack revolves around its Dashboard. This is a single place to start any work with the various modules: Capture a setup and edit capture projects with PackRecorder, create or edit MSI / MST based projects with PackDesigner, create transforms with PackTailor, and of course: edit your setup configuration. The actual design of the dashboard is very simple and intuitive.
Setup
The setup follows an interesting methodology. The settings are stored in a “profile” which contains the various options you would associate with any packaging tool; Templates for MSI / MST creation, exclusions lists (called filters) and various settings for the supported output formats (MSI, MST, App-V, SWV, and ThinApp). The filters section allows applying multiple filters during the capture process. For example, if I wish to create virtual packages, I can create a filter specifically for this task. There is also a central “Repository” (named PackPoint) similar to other packaging tools that allow the centralized management of resources (merge modules, profiles, exclusion lists, templates etc.) for packaging teams.
The fact that you can dynamically choose which profile to use allows you to “fine-tune” the application for multiple scenarios without having to setup multiple environments, for example for different customers or different types of packages. However, a hint providing info about the currently active profile, e. g. on the dashboard, would be make this benefit more clear.
PackRecorder
PackRecorder is the integrated capture tool and can be installed independently. It provides a simple wizard based interface that guides you through the steps required to capture an application. The resulting capture project shows not only shows the file and registry, but also permissions changes (file and registry) as well as modifications to services and environment variables. The PackRecorder can also be used to capture MSI based installations in order to create a transform. It’s worth noting that there is a convenient option here to create virtual packages directly from the capture project.
Creating transforms
The PackTailor wizard allows transform generation in the easiest possible way: by executing the ui sequence of an MSI based installation. Modifications of features, components, properties, etc. are stored as an MST. However, for more complex packages, you’ll probably prefer to use the PackDesigner tool.
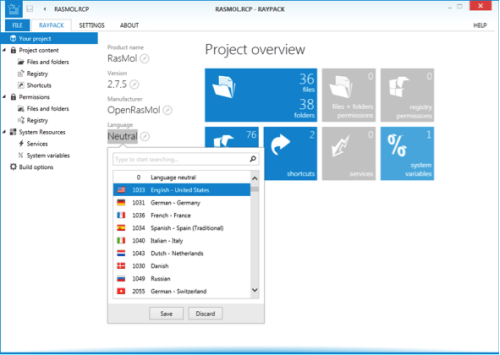
MSI / MST Project Editor
In the product information there is a section that states that RayPack is “Packaging for a Wise’r generation”, suggesting that the product hopes to be seen as a replacement for the discontinued Wise Packaging Studio. This is more than evident in the layout of the MSI / MST Editor. Those familiar with Wise will feel more than comfortable using RayPack. The Editor layout is divided into two areas, the Visual Designer (think Wise Installation Expert) and the Advanced View (think Wise Setup Editor). Not only are MSI / MST based projects edited here but, as we saw in PackRecorder, virtualized packages can be created directly from here as well.
Visual Designer
The Visual Designer view hides the complexities of MSI and provides an easy to use and understandable way to edit and modify the MSI / MST based project. All familiar sections are present; Files, Folders, Registry, Shortcuts, File associations etc., but also some more for less commonly needed changes such as IIS and SQL database, configuration files (text, inf, xml) and scheduled tasks. All wrapped up in wizards that guide you through the process of creating the required entries. From within the Visual Designer you can also create a report about the contents of the project.
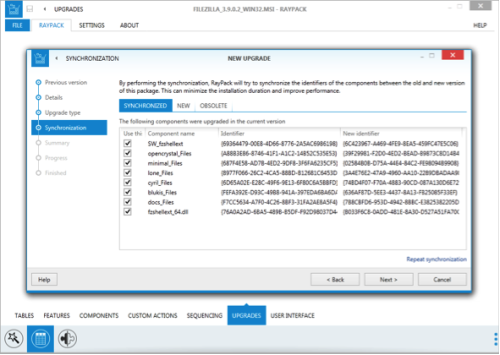
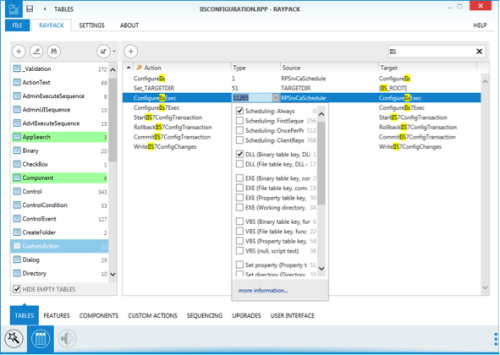
Advanced View
The Advanced View allows you to get past the wizards and features designed to make things easy where you can directly edit the MSI database tables. Here you can edit features, components, custom actions, adjust sequencing and the user interface. If you are not a fan of editing these tables, you’ll be happy to hear that there are also wizards available to guide you through the process of adding things like custom actions. The Upgrade section contains a sync mechanism for optimized software update preparation, which allows to you to generate minimal update files for quicker version migrations on end-user devices.
There are a couple of nice features in the table editor that caught my eye as well, table referencing and bitmask resolution. Table referencing allows changing of things like the internal name of a feature in the feature table, and when you do, any other tables referencing the internal name are automatically changed as well. The bitmask resolution feature means that instead of just having to edit a number in a table cell (Custom Action type for example), you are provided a drop-down box that allows you to simply select the labeled options that make up the resulting value (very handy!).
Virtualization
At this time, Virtualization support is restricted to converting existing capture projects or existing MSI / MST based projects to the formats App-V (4.6 and 5.x), SWV (Symantec’s virtual package format) and ThinApp (4.x and 5.x). Unfortunately at this time, there is no way to edit the resulting packages from within RayPack. So if the available settings in the profiles are not in-depth enough, some work with the vendor specific tool is required, but I’ve been told this is being worked on.
Closing words
RayPack is an application repackaging and virtualization solution worthy of your attention. With all the features you’d expect from a professional set of packaging tools, it also brings a few surprises to the table that will surely help to improve the quality and speed of your packaging process.
The user interface is very clean and intuitive and the design comes very close to how Wise Package Studio operates, which may make for an easy transition in former Wise shops. The ease of converting applications to the most popular virtualization technologies is great, currently with App-V 4.6 and 5.0, ThinApp and SWV supported.
Since RayPack’s development is community driven, I would like to see some enhancements / features to be added very soon:
1. ITNinja integration ;-)2. The good, old workbench to track and script what can be automated
3. AppX support to be Win10 ready

Comments